Would you like to control the water temperature in your water heater using your FIBARO Smart Home? There is nothing simpler, except for a minor change that Fibaro introduced in version 5.153.120 of its system. That change is the restriction of the maximum adjustable temperature of the virtual thermostat to 30 degrees Celsius.
What this means, how to bypass it, and what steps to take to create a virtual thermostat for controlling a water heater, is exactly what we will cover in this article.
Why connect your water heater to a Smart Home?
Let's start with the basics. What is the actual point of such an integration? After all, every other water heater today is smart, has its own app, or is energy-efficient. The answer lies in the fact that a Smart Home system is only truly smart when it can connect all parts of the house into a single, cohesive unit. Yes, you can buy a smart plug and control a lamp with it, you can also buy Somfy smart blinds that have their own app, and you can have Salus smart thermostats that also run on their own app. However, imagine you have such a Smart Home and you are leaving the house. You want to switch the house into an eco/away mode. The process in this case looks like this:
- You open the smart plug app and turn off the plug.
- You open the blinds app and close them.
- You open the thermostat app and switch to eco mode.
- You open the water heater app and lower its temperature.
- etc., etc...
This is really not smart! In fact, it is so incorrect that we have a whole article discussing the differences between Home Automation and a Smart Home as portrayed in commercials.
When you read that article, it will become clear that the concept of a Smart Home should be about simplifying your life through automation, not complicating it. So what we described above should actually work like this:
- You press a "Leave Home" button by the door, a widget on your phone, or issue a voice command.
- The blinds close, the heating switches to eco mode, the lights turn off, and the water heater is set to an economical temperature...
The core idea of this integration is that you want the whole house to function as one great machine that doesn't require you to serve it.
Of course, the main reason for connecting a water heater to a Smart Home and controlling it is energy savings. Right after space heating, the water heater is the second-largest consumer of electricity, and most people, even when away for the whole weekend, keep heating the water as if the entire family were going to take a shower in the evening.
Which water heater can be integrated into a Smart Home?
There are virtually no limits. Practically any water heater can be integrated. You can integrate a water heater with a single heating element, one with multiple elements, or a smart water heater... But if we are going to perform this integration, you basically don't need to reach for expensive smart versions when buying a water heater. A simple water heater with a basic thermostat is enough. The built-in thermostat on the water heater will serve as a "safety" backup for this integration.
What devices are needed to integrate a water heater into a Smart Home?
I will be very brief in this section and won't go into deep details, because if you don't know the answer to this question, it is better to leave the installation to professionals. On the other hand, if you just need a push in the right direction, this is the way:
- FIBARO Smart Implant - This is a smart module that allows us to measure the temperature in the water heater and simultaneously trigger a contact. We will use only one contact, so if you have a boiler right next to the water heater, there is no reason why you couldn't use the second contact to switch the boiler for space heating.
- Sensors for FIBARO Implant - We connect these sensors to the implant and place one of them into the probe pocket of the water heater. This ensures the measurement of the water temperature. Of course, you can connect additional temperature sensors and use them to measure the heating pipe temperature, ambient air temperature, etc.
- Auxiliary Relay/Contactor - Since the FIBARO Implant has a weak contact rating, we must add a heavy-duty auxiliary relay (contactor) between its output and the water heater itself. Naturally, it needs to be rated with sufficient power to handle the switching of this heavy load.
Once everything is wired up, the water heater will be switched by this implant. At this point, after installation, we have the ability to toggle the relay from the FIBARO system, turning the water heater on and off.
Important Safety Warning!
In this section, I must emphasize that integrating a water heater is not something you should do if you don't fully understand it. Incorrect settings can lead to water overheating and dangerous overpressure.
At the same time, I highly recommend keeping the original thermostat operational on the water heater and setting it to a slightly higher temperature than you generally require. This way, you ensure that even in the case of incorrect smart settings or a control failure where the implant's relay remains constantly on, the water heater will only reach the maximum temperature set by its own hardware thermostat, thereby preventing overheating.
Also, pay extra attention to the water temperature settings. If your system doesn't have a thermostatic mixing valve installed, make sure to avoid settings that could result in scalding hot water.
How to configure the water heater in the FIBARO system?
Once everything is correctly wired, we can see the water temperature in the system, and we have the ability to turn the water heater on/off, we can dive into the software configuration. The idea behind this setup is to create a Virtual Thermostat, which is a device in the app that easily allows us to set the desired temperature in the water heater and displays everything neatly.
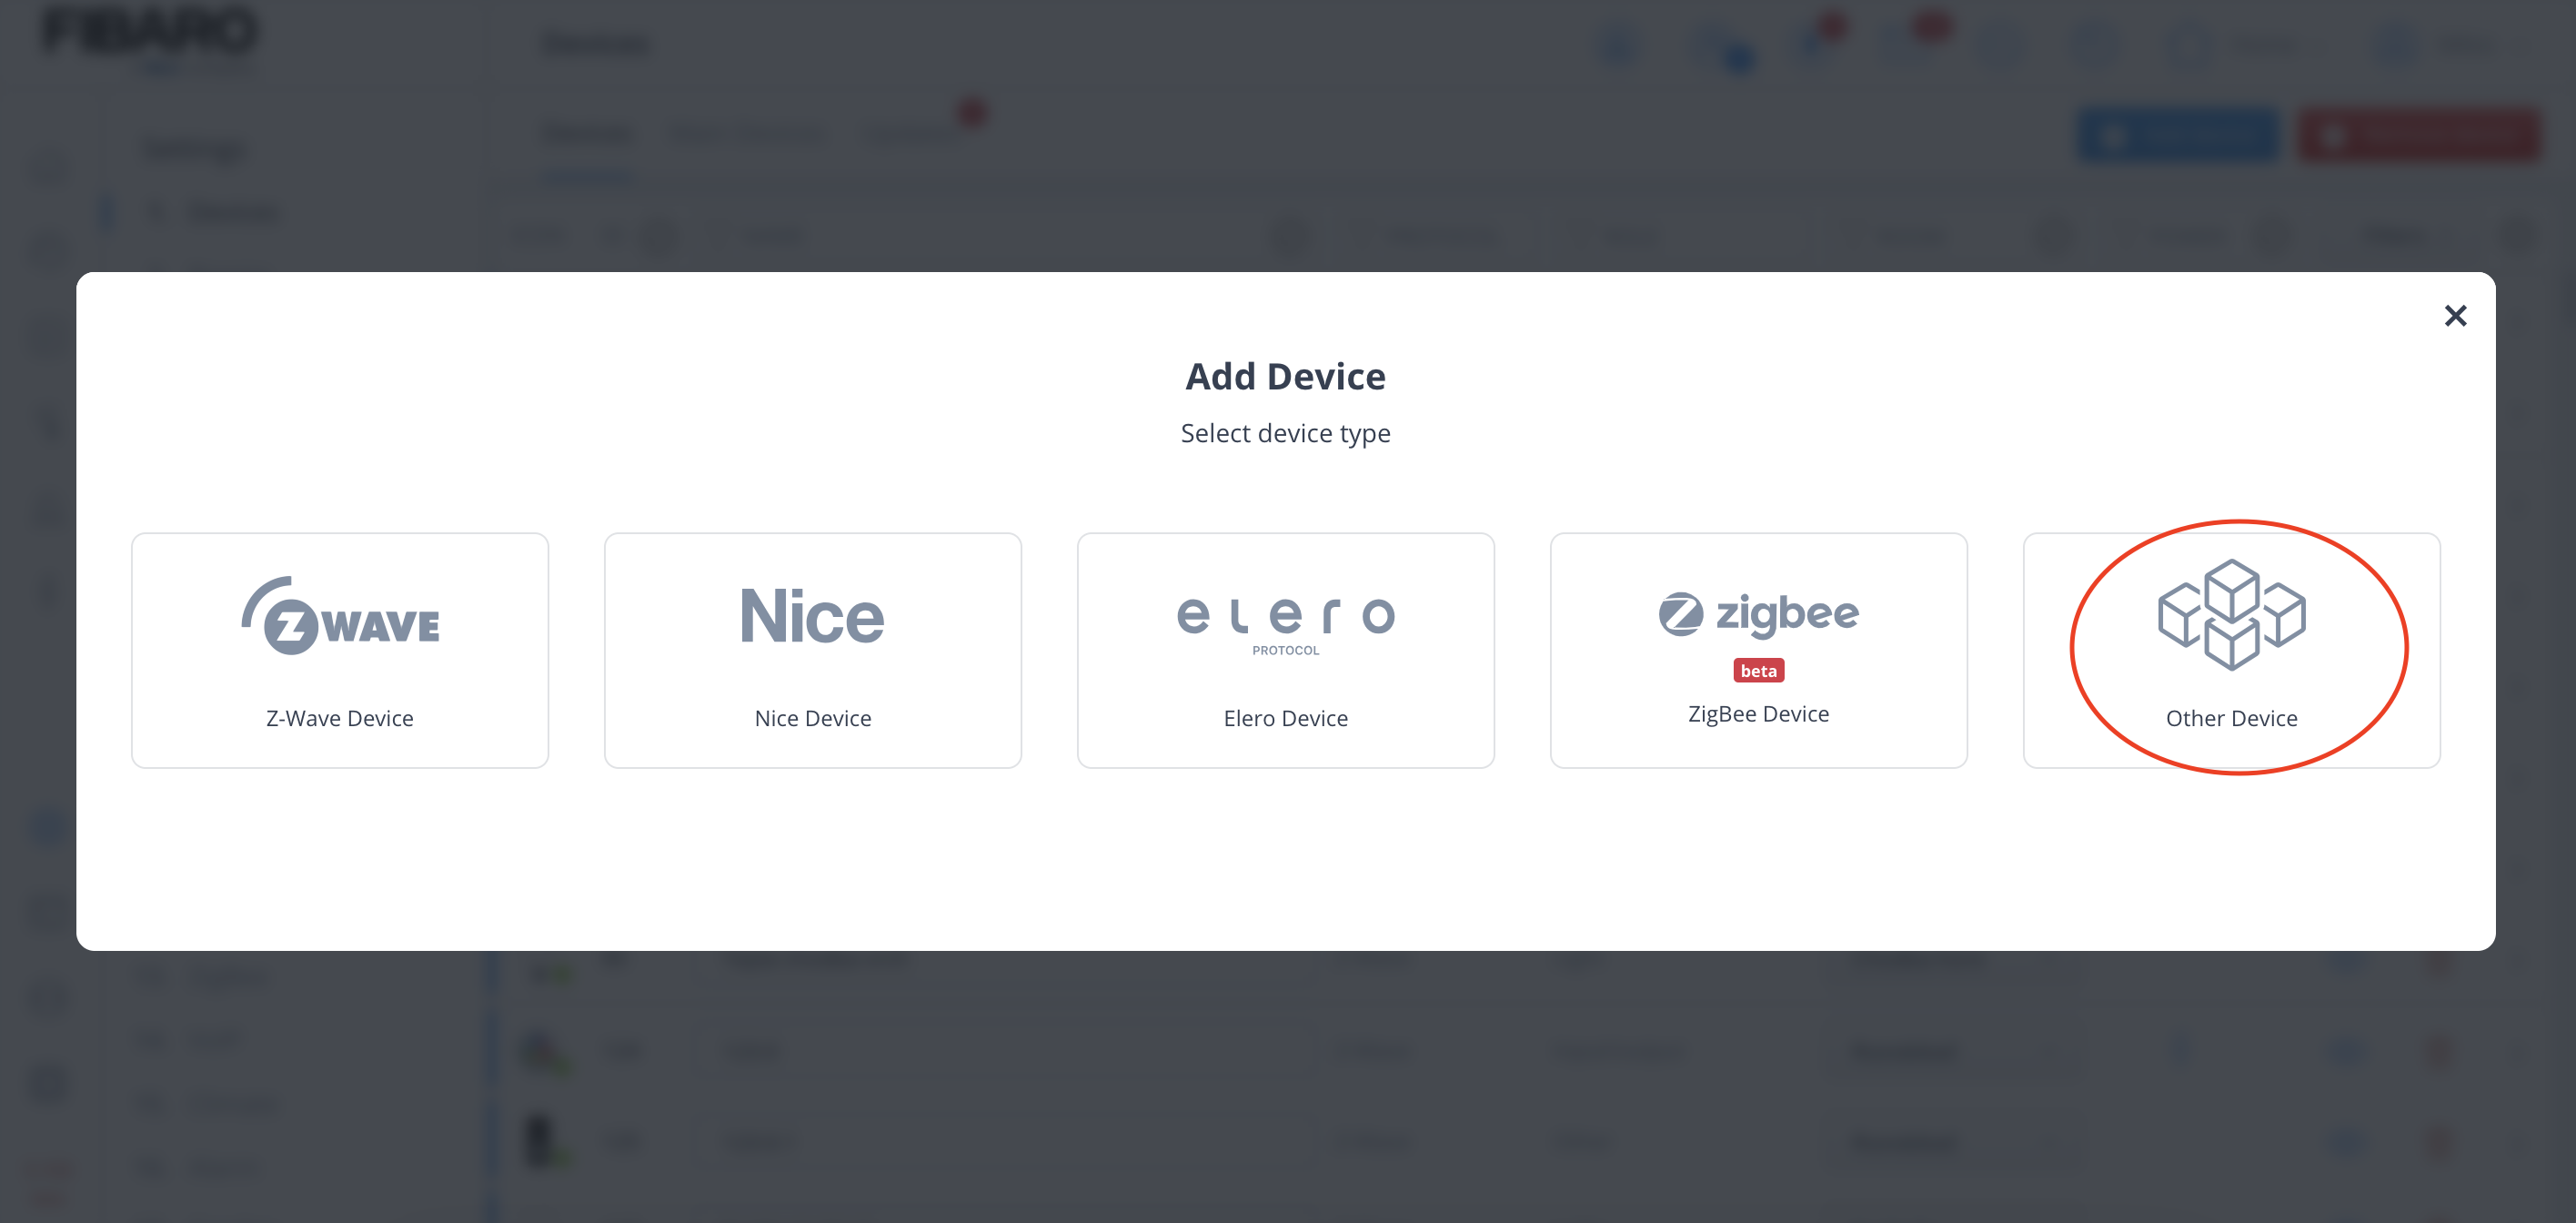
First, navigate to the "Devices" tab in the system and add a new device. You are certainly familiar with this process.
Next, choose "Others".
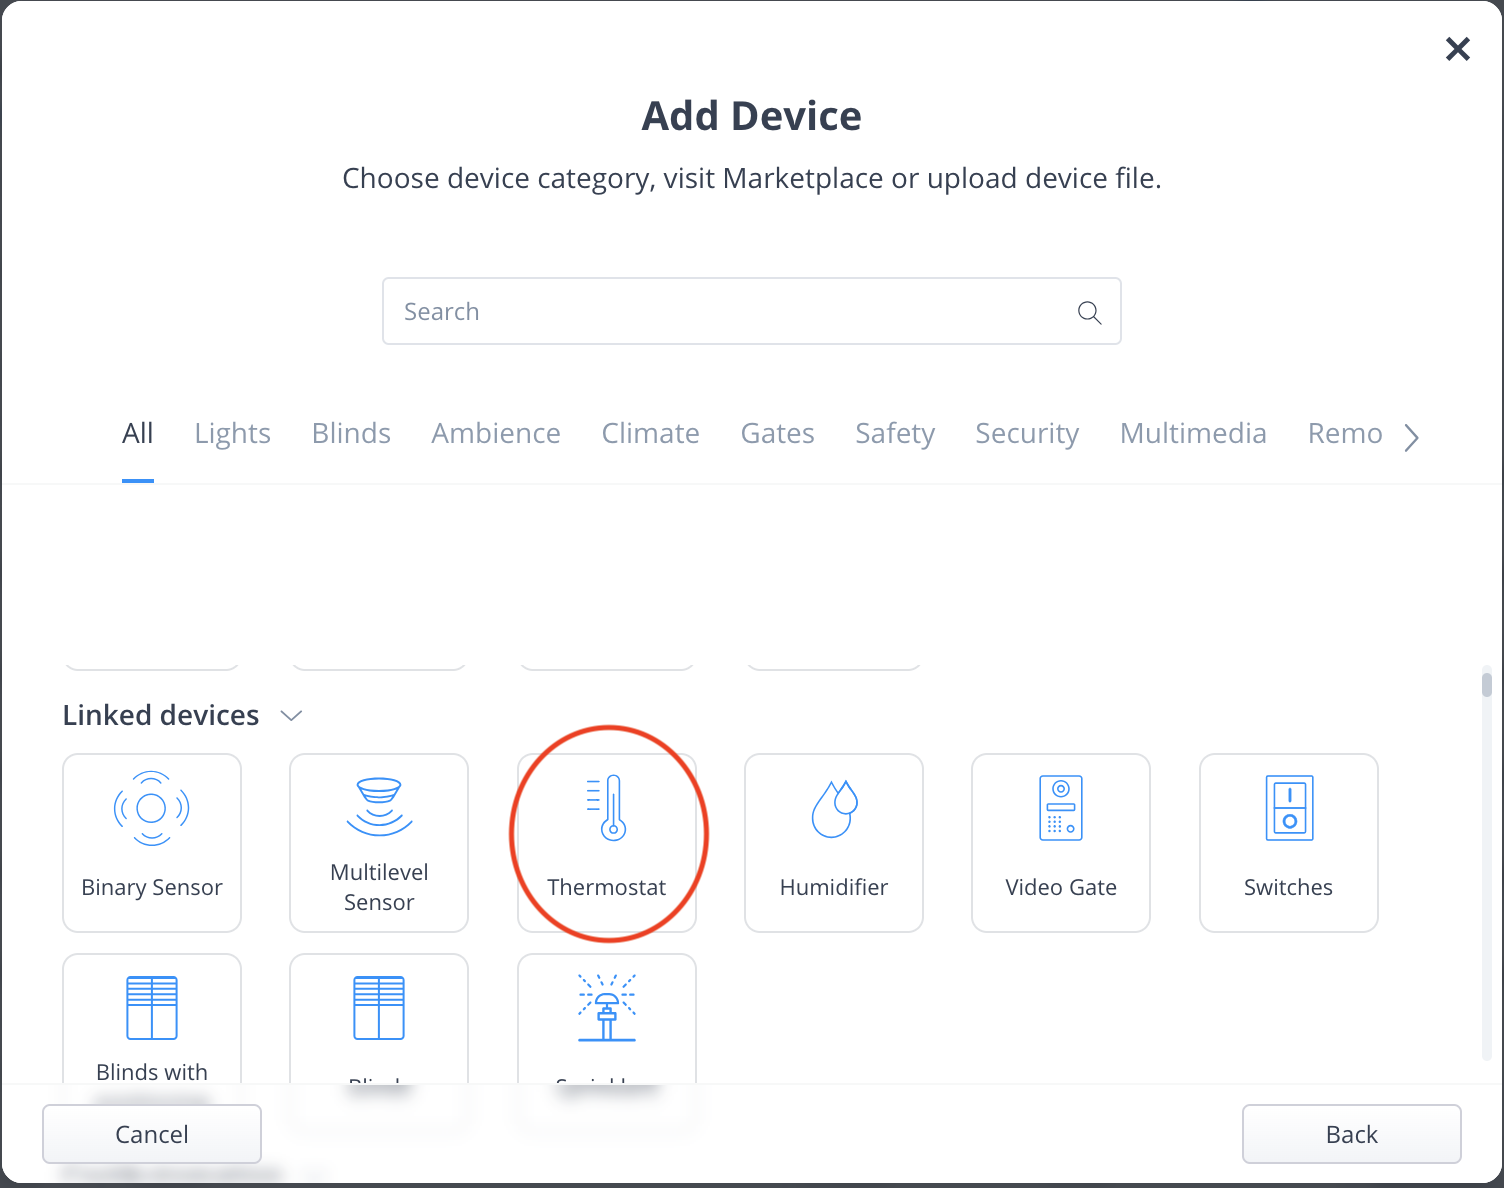
Then, select "Thermostat" from the menu.
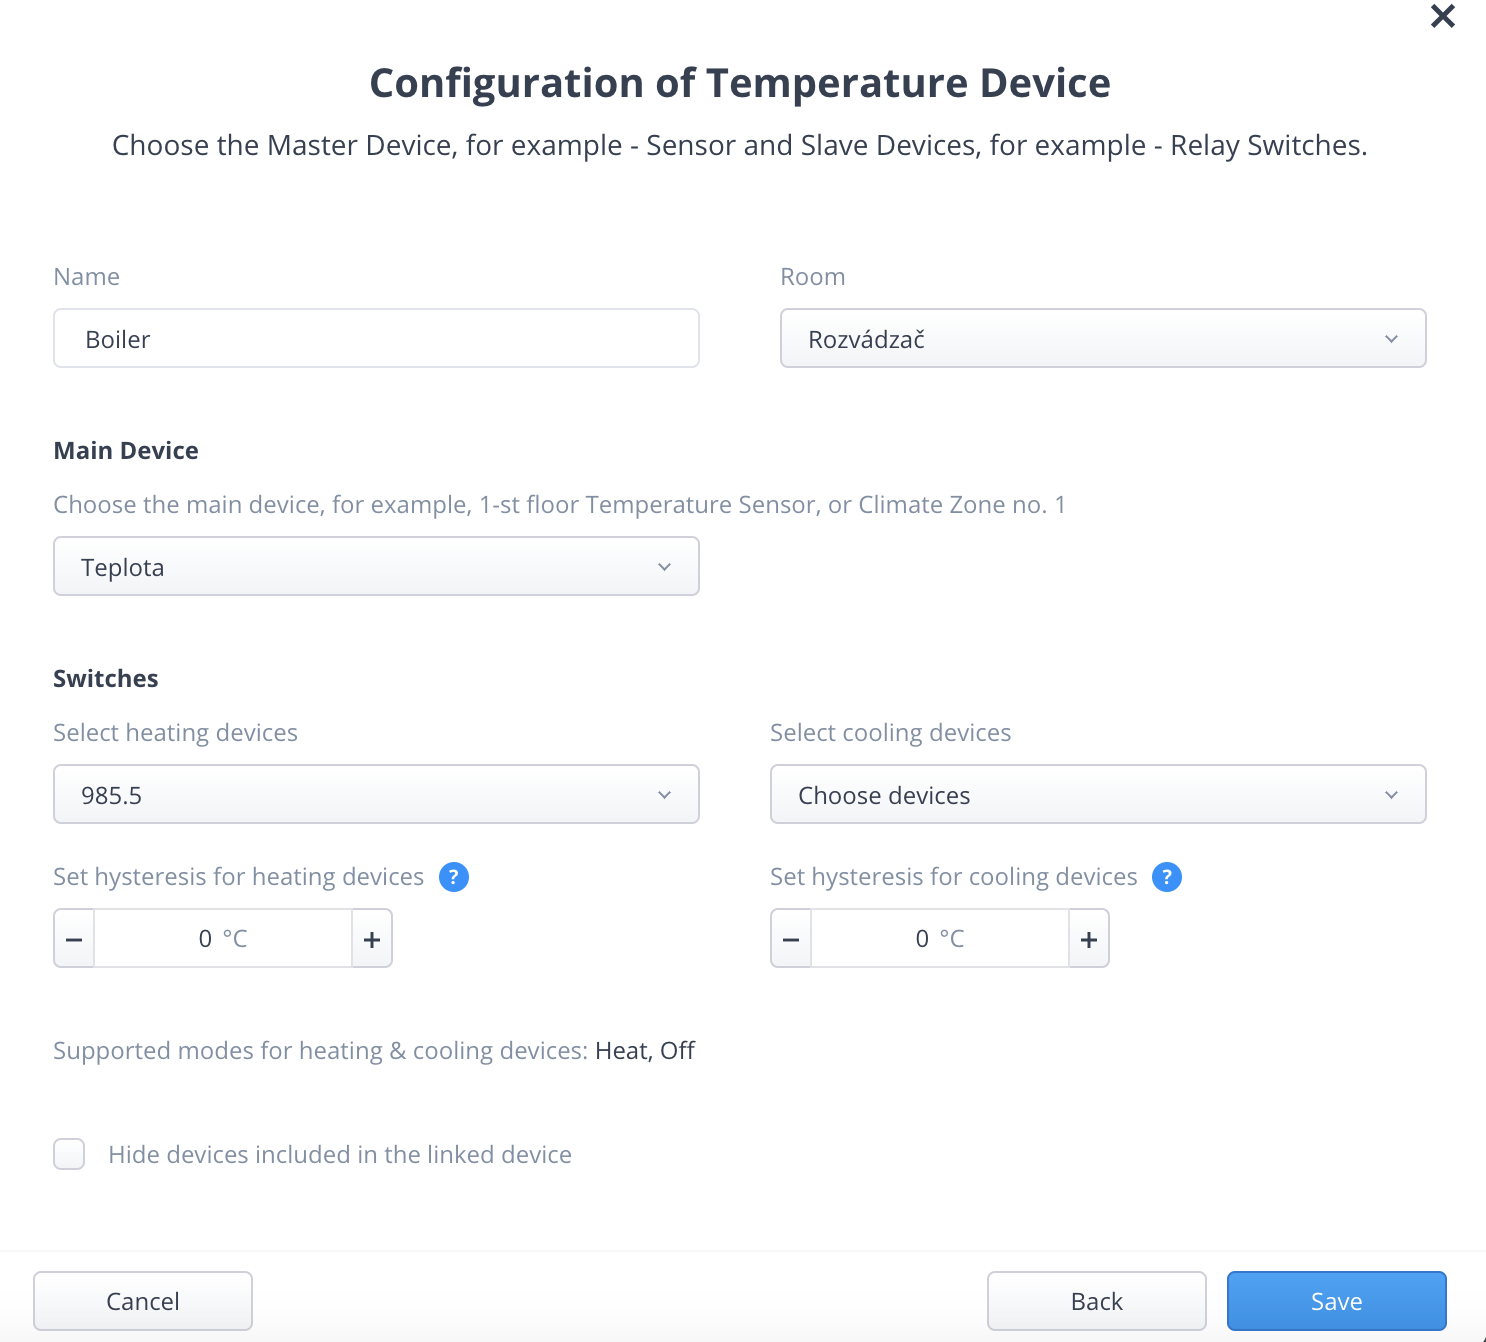
On the next screen, set up everything necessary: the name, the room, select the temperature sensor that measures the water temperature in the water heater, and select the output from the implant that controls the heater. We can subsequently hide the underlying hardware devices in the system so we don't see duplicates in the interface.
Immediately after saving, this device will appear. Just switch it to heating mode, and the water heater will start heating the water to the set temperature.
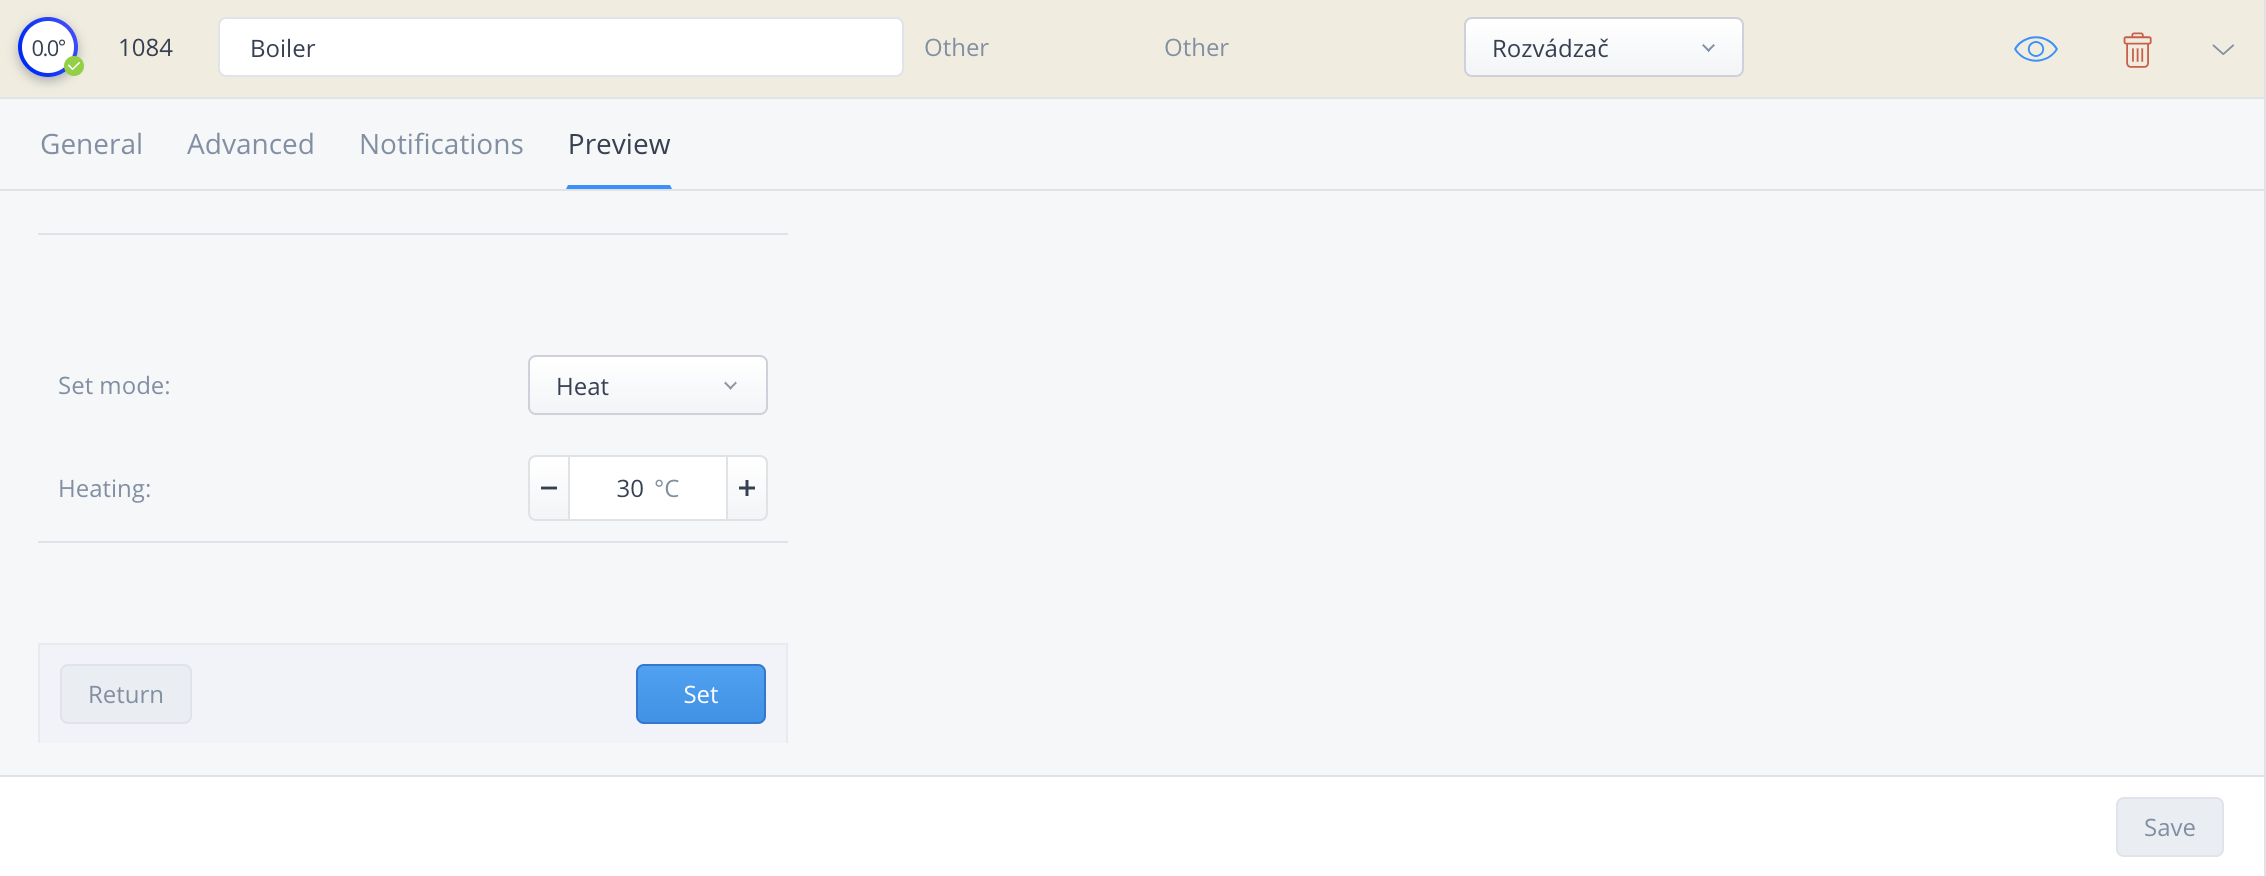
Here, however, we encounter the problem I mentioned right at the beginning of this article. For safety reasons, Fibaro restricted the maximum adjustable temperature to 30 degrees Celsius. In most cases involving underfloor heating, this is naturally sufficient, but the water in a water heater should be maintained at a significantly higher temperature (also to prevent bacteria like Legionella).
How to increase the maximum temperature of a virtual thermostat in FIBARO?
To overcome this limitation, we need to use a little trick. Create a LUA scene and paste the following code into the right side of the scene window:
deviceId = Virtual Thermostat ID,
propertyName = 'heatingThermostatSetpointCapabilitiesMax',
value = Maximum Temperature
}
api.post("/plugins/updateProperty", data)
In this code, you only need to change the red text, where ID will be the number of our virtual thermostat and Maximum Temperature will be the real temperature (e.g., 60) up to which the thermostat can now be set. The complete code will look like this:
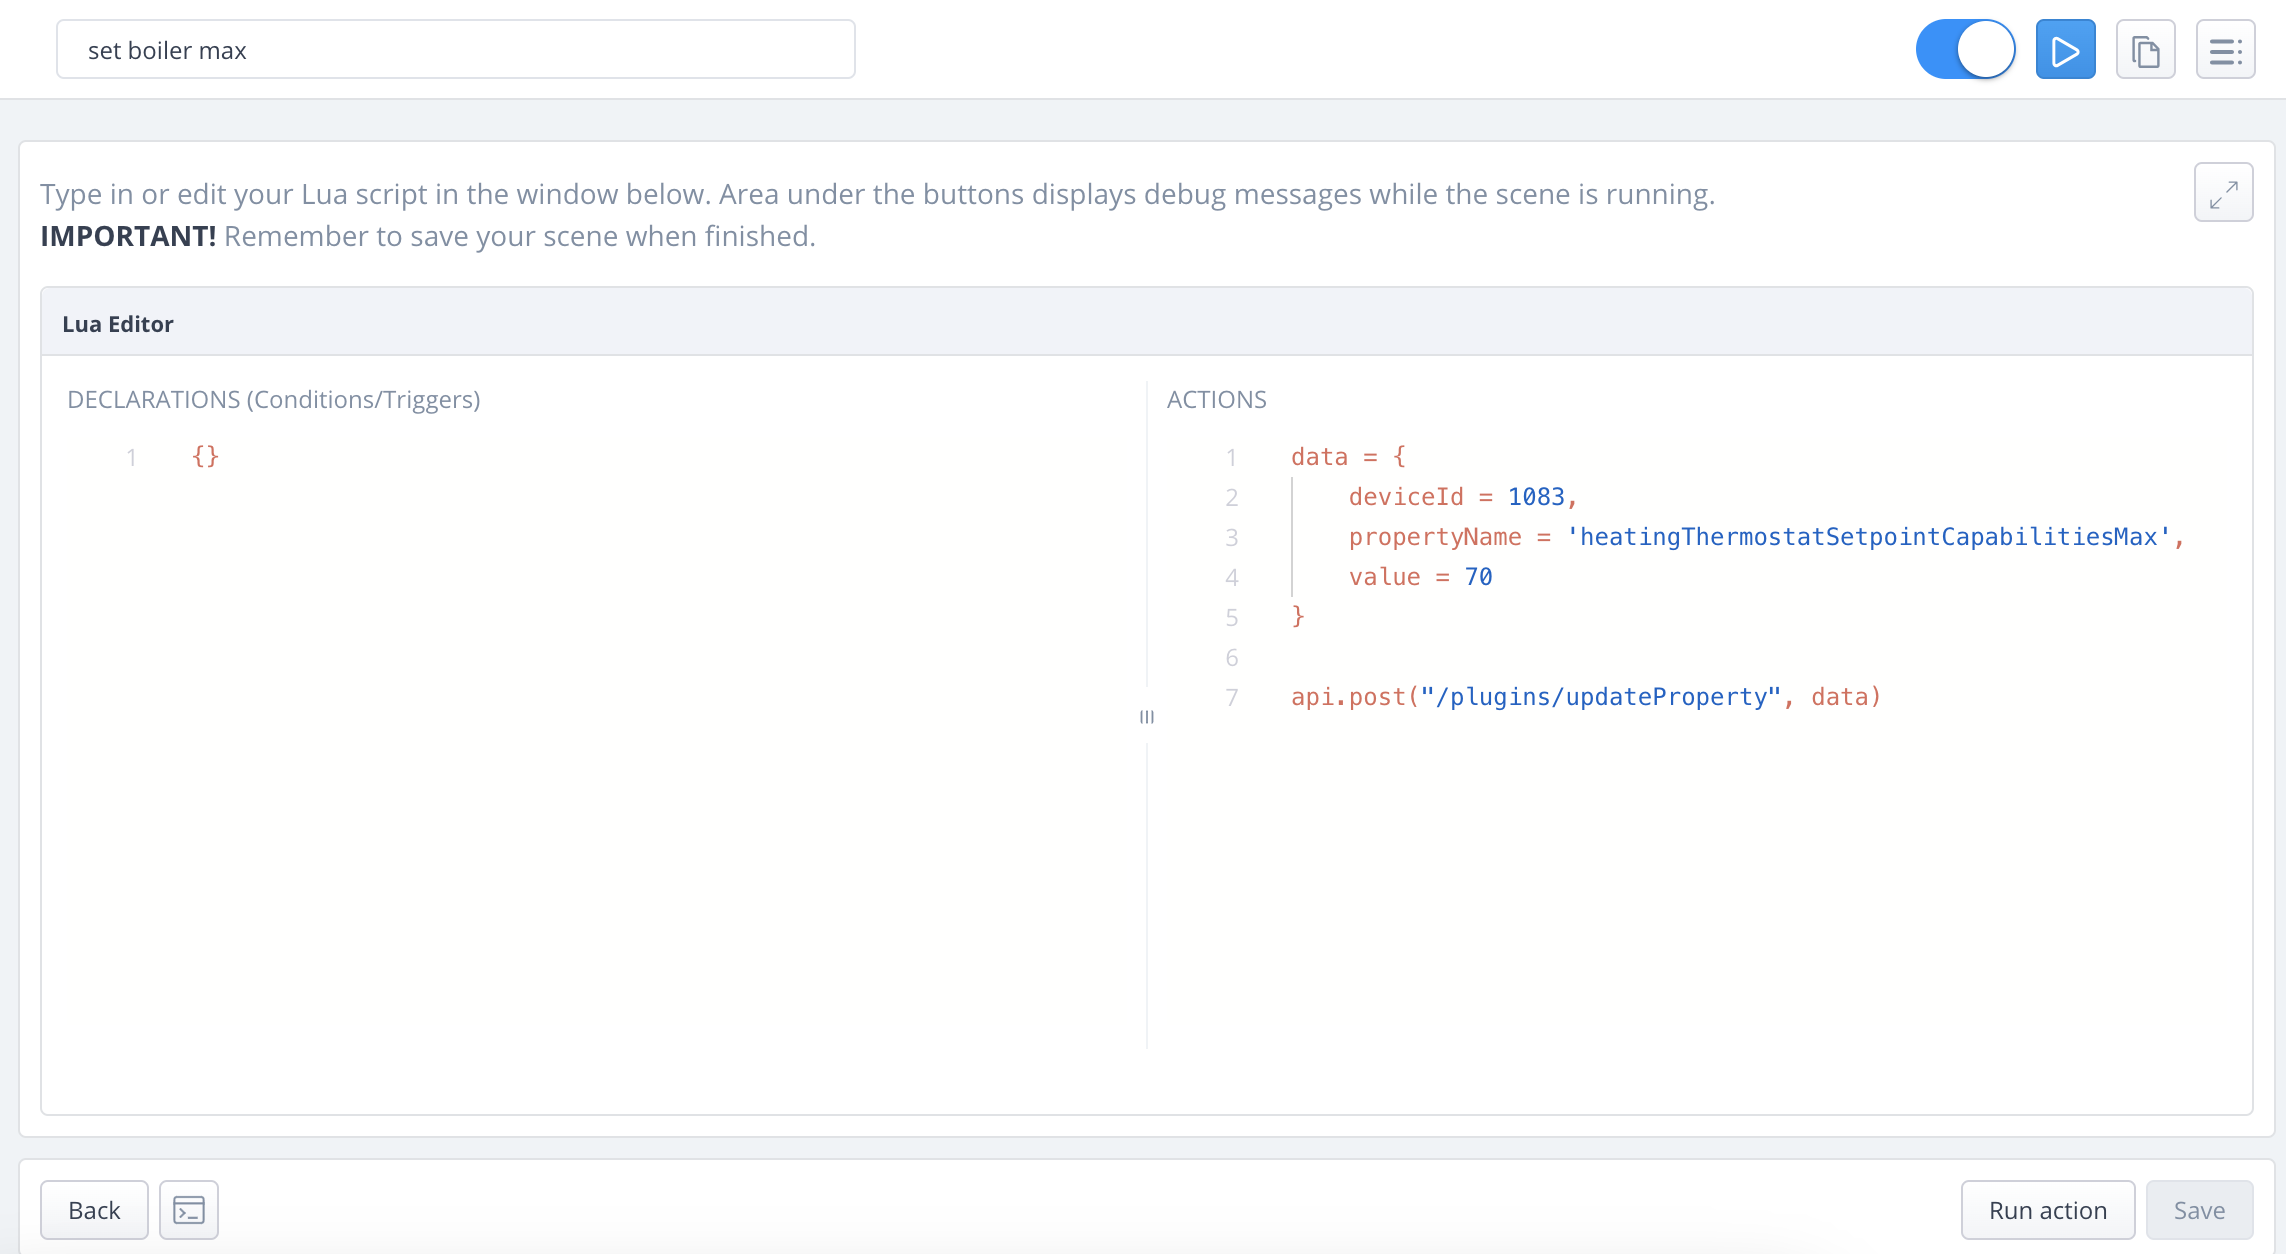
After saving it, we just run the scene once. This will subsequently allow us to set the temperature on the given thermostat up to the limit we defined in the LUA code. You can then delete this scene, as there is no need to keep it in the system anymore.
Setting up a Domestic Hot Water Schedule
This part is completely optional. Once the virtual thermostat is created, it is already possible to manually adjust the thermostat temperature via the FIBARO system. But if we want to improve it further, we can create a heating schedule specifically tailored for water heating.
This is created in the exact same way as regular heating schedules in the FIBARO system. The setup might then look something like this:
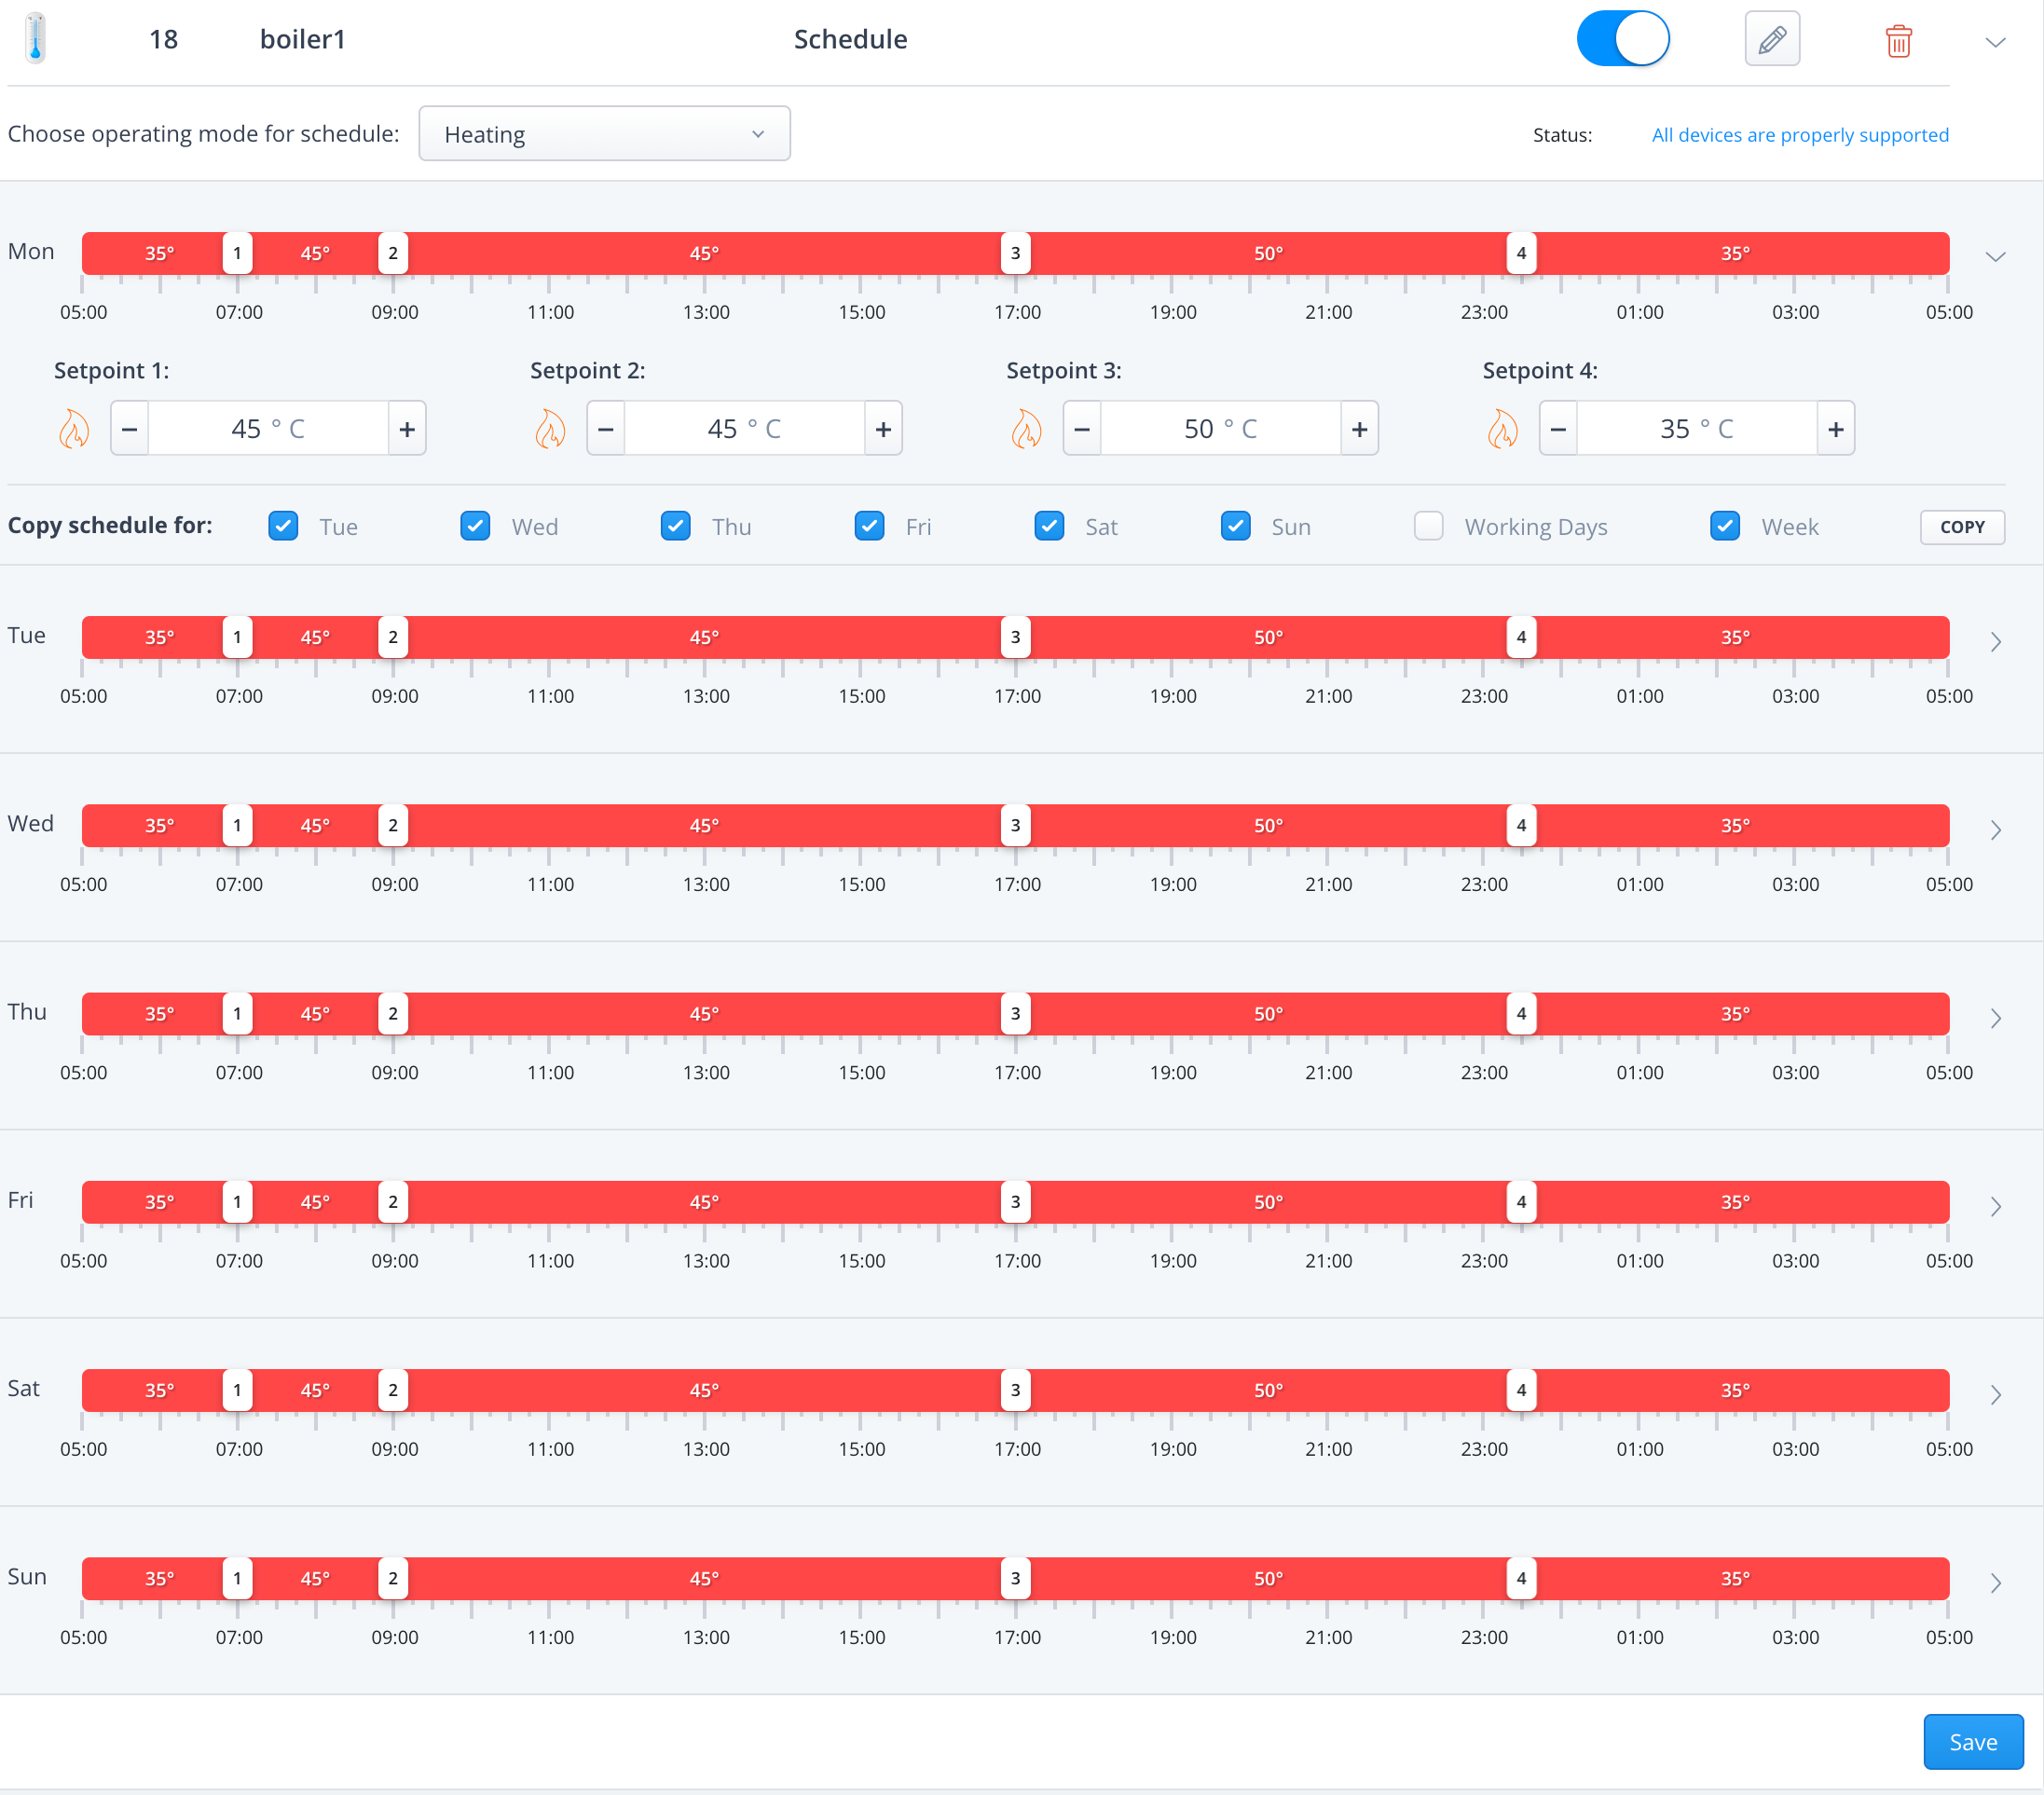
As you can see, with such a schedule, you can easily define that the water temperature in the water heater will be slightly reduced before midnight. This schedule can be flexibly customized. For example, if you usually go to bed at 10 PM, there is no need to fully heat the water overnight. Of course, the water temperature doesn't drop immediately, but lowering its target value results in genuine minor savings. And if you have solar panels on your roof, it is ideal to shift the water heating to daytime hours when the sun is usually shining.
Furthermore, if you are using a water heater temperature schedule, it is just one small step to setting up an "Away" mode that automatically lowers the water heater temperature when you leave, and a "Vacation" mode that completely turns the water heater off. Thanks to these settings, you can truly streamline the efficiency of water heating in your home.
Of course, this is just an example of a possible configuration. As soon as you have a virtual thermostat created in the FIBARO system, you can customize the settings however you like. Despite this recommendation, I must add that it is wise to test the actual consumption of your water heater under your specific conditions. For example, compare a day when the temperature is constantly set to 50 degrees, check the consumption, and then try lowering the temperature when you leave for the day and check the energy required to reheat the water upon your return. Through this method, you might find that for a single day away, it pays off to lower the temperature only slightly, but for absences of two or more days, a significant drop yields genuine energy savings.